Official Guide / First Connection
Shadowrocket Guide
Import an existing server, choose a routing mode, and connect. Then use test results and actual access to confirm that the settings work.
01 / SERVER
Add a server or import a subscription
First, check whether you have a subscription link or details for an individual server. Both start from Home, but the steps differ: a subscription link retrieves a set of servers, while individual server details create one entry. Complete either method; there is no need to import the same server twice.
Subscription link: Choose Subscribe
Copy the complete subscription link provided by your service provider. On Home, tap Add Server in the SERVER group, open Type, and select Subscribe. Paste the link into the address field, then save. Check that the beginning, end, and query parameters are intact, and do not copy any explanatory text next to the link. Return to Home and, once the subscription loads, expand its group to confirm that server entries are visible. If the group name appears but contains no entries, the import is not complete.
Individual server: Enter the fields for its Type
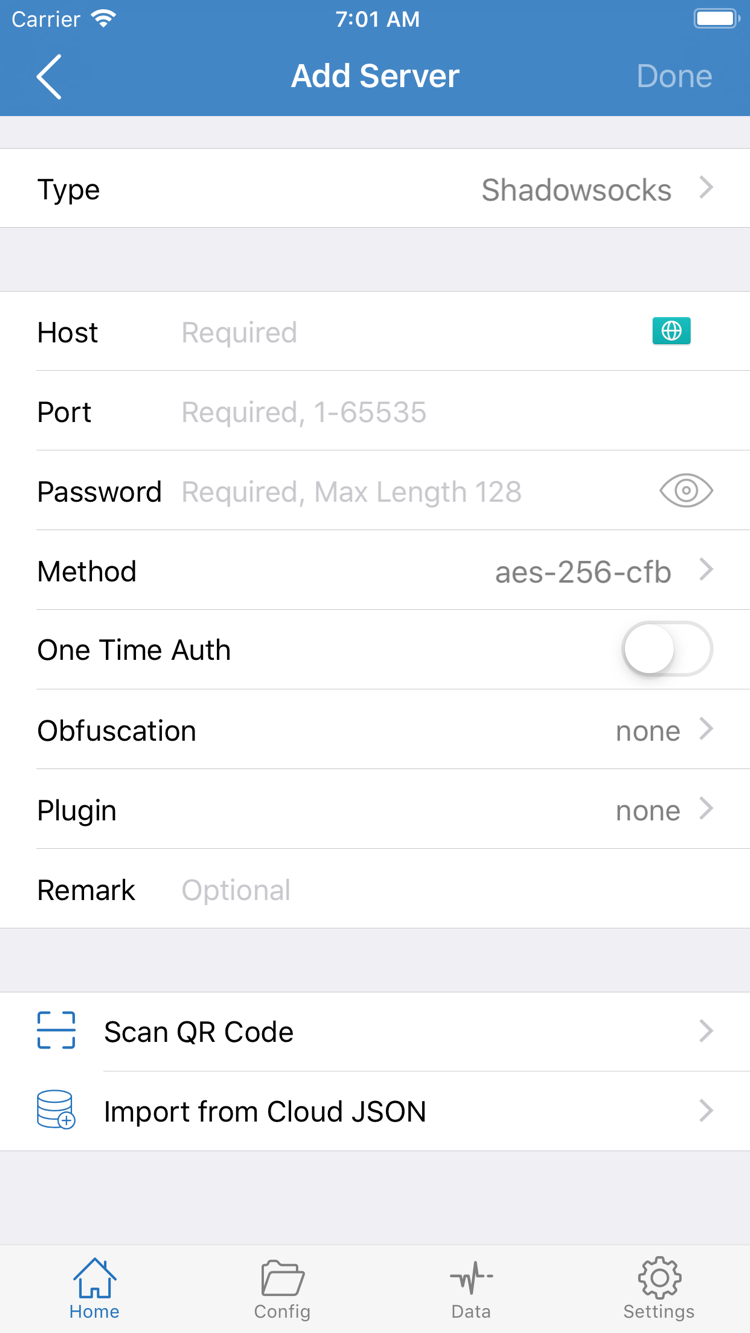
In Add Server, select the Type that matches the protocol provided by your service provider, then enter Host and Port. Host is a hostname or IP address; enter Port separately. Do not enter a subscription link or an address that includes the port in Host. Password and Method in the screenshot are examples of fields for the selected Type; fields may differ when you change protocols. If the interface asks for a password, encryption method, or other parameters, enter the values provided by your service provider. Do not substitute fields from another protocol when unsure.
If your service provider has supplied a server QR code, use Scan QR Code in Add Server. After scanning, check the Type and address before saving. Full subscription links, server passwords, and QR codes may contain credentials. Do not post them publicly or include them in screenshots shared for support.
Return to Home and select the entry to verify in the SERVER group. If you imported multiple sets of details, check the group and server names to avoid testing a different entry with the same name. For managing multiple subscriptions, handling share links, or setting updates, see the subscription and server management guide. For this test, select one specific entry before configuring routing.
02 / GLOBAL ROUTING
Choose a routing mode
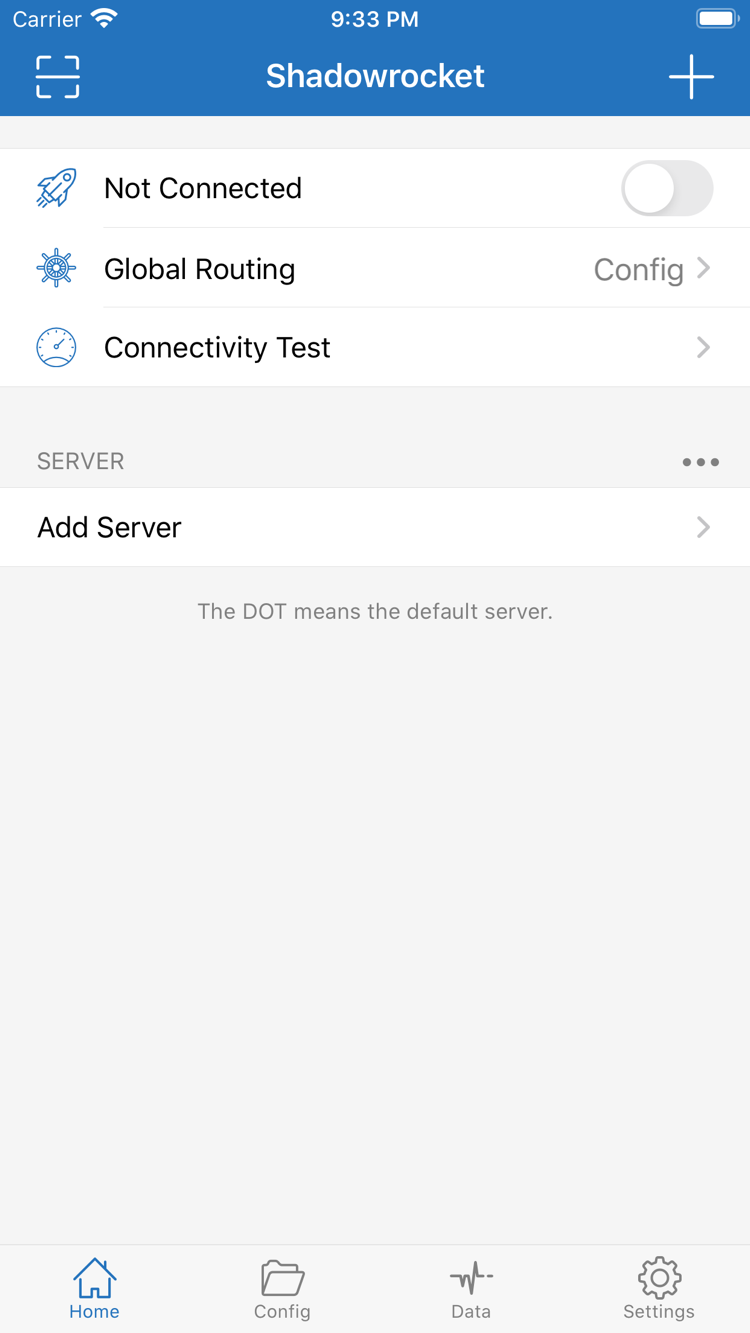
The server determines where proxied connections go; Global Routing determines which connections are handled by the proxy. Tap Global Routing on Home to open the selection list. For this initial setup, learn these three modes and choose one based on the behavior you want to test:
- Config: Rules in the current configuration determine how connections are handled. Choose this mode when different destinations should use
PROXYorDIRECT. - Proxy: Routes connections handled by the client through the proxy. Use it to temporarily check the proxy path for the selected server without first checking which rule matches the test target.
- Direct: Sends connections handled by the client directly, without using the selected proxy server. Use it to compare whether the current network can access the same target directly.
When using Config, check the current configuration first
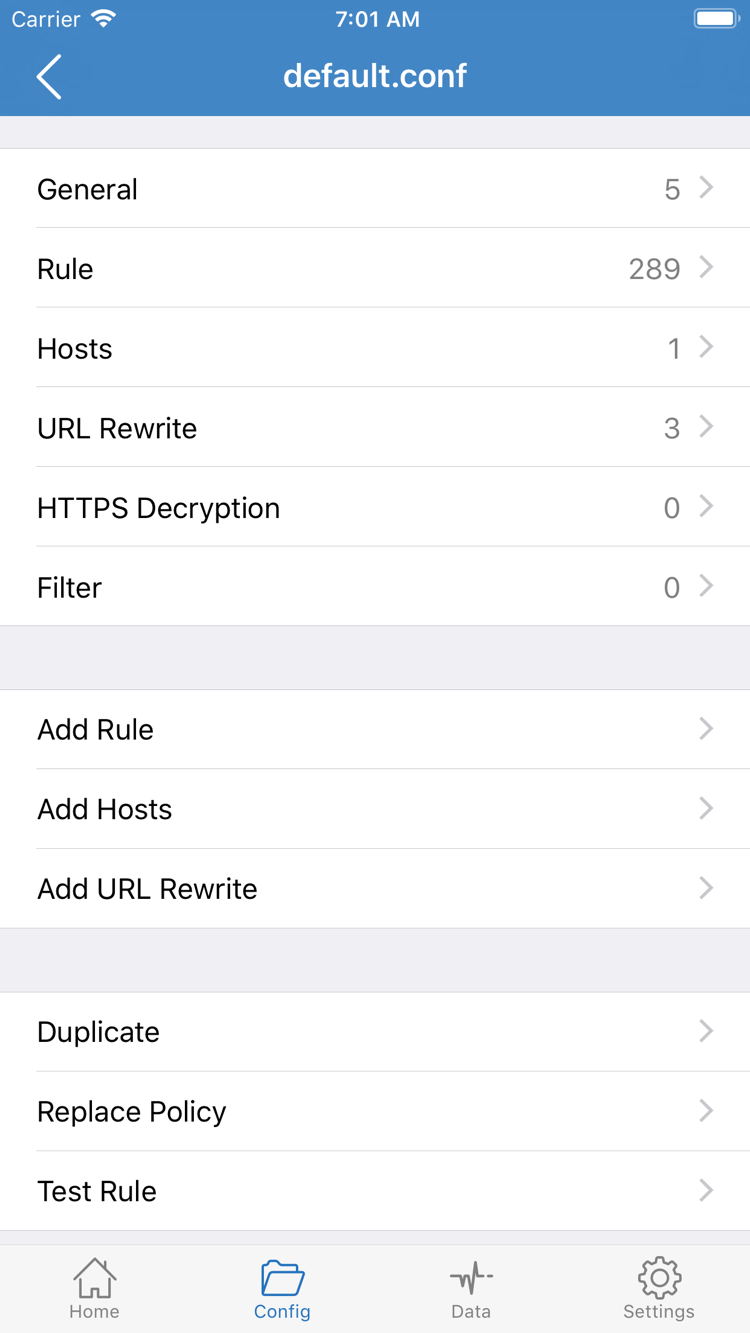
After selecting Config, open the Config tab and check which file is in use. Config in Global Routing is a running mode; the Config tab at the bottom is where configurations are viewed and managed. Selecting the mode does not switch the configuration file. Open the current file and go to Rule to check the rules and their policies that may match a test target. This guide does not require adding rules; first review the existing settings.
When checking a domain, look not only for an entry that names it directly, but also for any earlier domain-suffix rule that includes it. If no earlier condition matches, check FINAL at the end. If the expected behavior differs from the current configuration, note the target, the rule that may match, and its policy. There is no need to change other configuration sections shown in the screenshot.
Return to Home and check the mode shown under Global Routing. If you temporarily used Proxy for comparison, note the original mode and switch back after testing. Keep the server unchanged during testing so that differences between modes are easier to interpret.
03 / HOME
On Home, connect
Before turning on the switch, confirm that the device can access the internet over its current Wi-Fi or cellular network. If the Wi-Fi requires web-based sign-in, keep Shadowrocket off while you complete the network sign-in, then continue. This helps distinguish basic network issues from proxy connection issues and avoids repeatedly changing servers when there is no internet connection.
Confirm the system prompt, then return to Home
On Home, check the selected entry in SERVER and the Global Routing mode, then turn on the switch at the top. When off, the status shown in the screenshot is Not Connected. The first time you turn it on, the system may ask whether Shadowrocket can add a VPN configuration. Confirm that the prompt was triggered by this action and names the correct app, then follow the system instructions. Return to Home and wait for the status to update; do not repeatedly toggle the switch.
If you previously dismissed the system prompt, return to Home and turn on the switch again to see whether it reappears. If the device is managed by an organization or another VPN is in use, do not delete existing configurations. First check what the connection is for; restrictions on work or school devices should be handled by the device administrator. If the switch returns to Not Connected, resolve the connection issue first rather than changing Rule.
Distinguish connection status from access results
An on switch only means the client has entered a connected state. It does not guarantee that a particular website is accessible or that all requests use the proxy. For example, with Direct selected, the switch can remain on, but this does not verify the proxy server. After connecting, note the current server, routing mode, and network, then run the tests in the next step.
If the device switches between Wi-Fi and cellular during testing, wait for the network to stabilize and test again. If the two results came from different networks, record them separately rather than attributing the difference to the configuration. For the initial check, use the same network to verify both the connection and access results before testing network switching behavior.
04 / CONNECTIVITY TEST
Test the connection and routing results
Run Connectivity Test on Home, then make a new request in your usual browser or app. Do both: Connectivity Test results depend on the current Test Method and test conditions, so they cannot replace testing an actual destination. Before testing, note the selected entry and Global Routing mode. If the interface lists multiple test results, record only the one currently in use for this round.
Compare actual access with the expected configuration behavior
With Config selected, choose two familiar targets from your configuration: one expected to use PROXY and another expected to use DIRECT. Reload each or make a new request, rather than treating a page opened earlier as a test result. Choose targets that can be tested consistently; do not judge the connection using only a page that often times out or requires sign-in.
If both targets open, that only confirms that access occurred; it does not prove the policies matched correctly, since some targets are accessible through either path. To check further, view the records provided by the client under Diagnostics in Settings. If the request is listed, find the same access by target and time, then check the visible matching rule or policy. Do not treat records created before the test as results from this round.
If only one target fails, keep the same server and network, and test that target again under Proxy and Direct. If it opens in one mode but not with Config, first check which rule actually matches the target in the configuration. If it fails in both modes, check the target itself and the basic network connection. After comparing, restore the original mode and make another real request to confirm that the everyday settings work.
05 / SETTINGS
Common connection failures: Troubleshooting
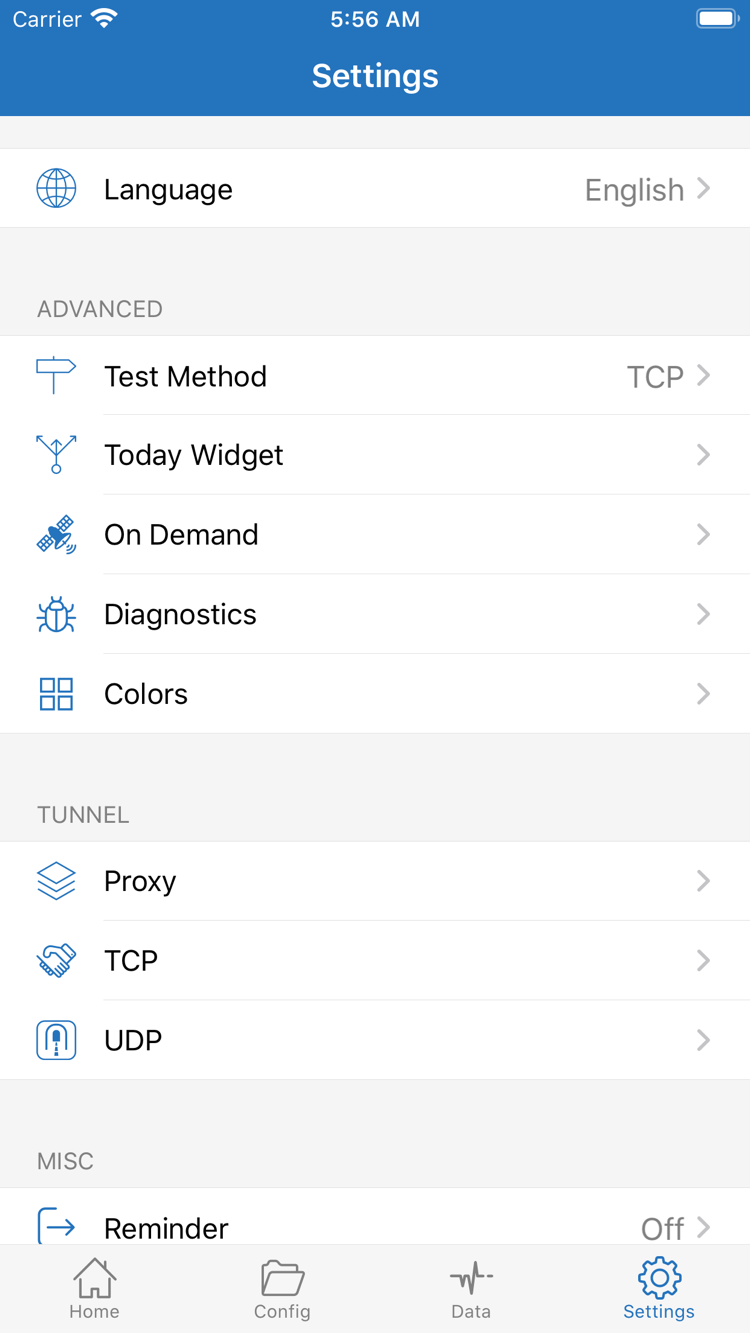
Start by checking the earliest step where something went wrong. If SERVER has no entries, there is no need to change routing rules. If the connection works but only some targets fail, you do not need to re-import the entire subscription first. Change one setting at a time and retest the same target from the previous step to see whether the change affected the result.
No server available to select after import
Check that you used Subscribe, the link was not truncated, and the current network can reach the address provided by your service provider. If the group exists but has no entries, first check whether the subscription update returned an error. For a manually entered entry, confirm that Type matches the original details, Host and Port are in the correct fields, and all required protocol fields are filled in. If your service provider says the subscription link has changed, get the updated link from them and update the existing subscription instead of saving the same invalid address again.
Connected, but tests or access fail
First check that the server selected on Home is the one you intend to test, then check Test Method in Settings. Results from different test methods should not be compared directly. If Connectivity Test fails but actual access works, first check whether the difference applies only to the test target; do not delete the server based on that alone. If only a few domains fail to open, return to Config and check whether the matching rule points to REJECT or a policy that is currently unavailable. Then look for requests from the same time in Diagnostics. If you see a domain resolution error, check the DNS settings in the current configuration.
The switch changes after switching networks
If the issue occurs only after switching between Wi-Fi and cellular, check On Demand in Settings and confirm whether the current network meets the existing connection conditions. Record the settings first, then connect manually on a stable network and test again. If manual connection works, check the On Demand conditions separately. If the system continues to prevent the connection, review the VPN configuration confirmation flow and device management restrictions from the previous step. Do not disable system protections as a troubleshooting measure.
If the cause remains unclear, find the relevant instructions in Frequently Asked Questions under installation, subscription imports, or routing troubleshooting. When describing the issue to your service provider, include only whether it occurred during import, connection, or access, along with redacted error text, the conditions that triggered it, and retest results.